Back to TheWorxHub for Senior Living Main Menu
Managing Pick Lists
In TheWorxHub, pick lists can be customized to allow for more personalized reporting and tracking of data. *Note: Clients who have purchased the WorxIQ application will need to contact their WorxIQ Administrator to make changes to pick lists in the account.
Pick Lists are used to provide the options that you select when creating work orders, assets, and more. They are key to making sure your TheWorxHub account is configured to provide the most value for your organization. There are five key pick lists to make sure you configure correctly to set yourself up for success:
- Work Order Category: This pick list allows you to provide customizable options to define the type of work that is being performed on a work order. Examples of Work Order Categories include Custodial, Electrical, HVAC, or Pest Control.
- Work Order Subcategory: This pick list allows you to provide customizable options to narrow down the type of work that is being performed on a work order. Examples of Work Order Subcategories include Trash Removal, Interior Lighting, Boiler, or Pest Control - Insects.
- Priority: This pick list allows you to provide customizable options to define the urgency of a work order. Examples of Work Order Priorities include Emergency, Next Day, or By Appointment.
- Asset Category: This pick list allows you to provide customizable options to define the type of assets that are being managed in your account. Examples of Asset Categories include Electrical, Fire System, HVAC, or Medical Equipment.
- Asset Subcategory: This pick list allows you to provide customizable options to narrow down the type of assets that are being managed in your account. Examples of Asset Subcategories include Emergency Generators, Fire Extinguishers, Chillers, or Defibrillators.
How to Customize a Pick List
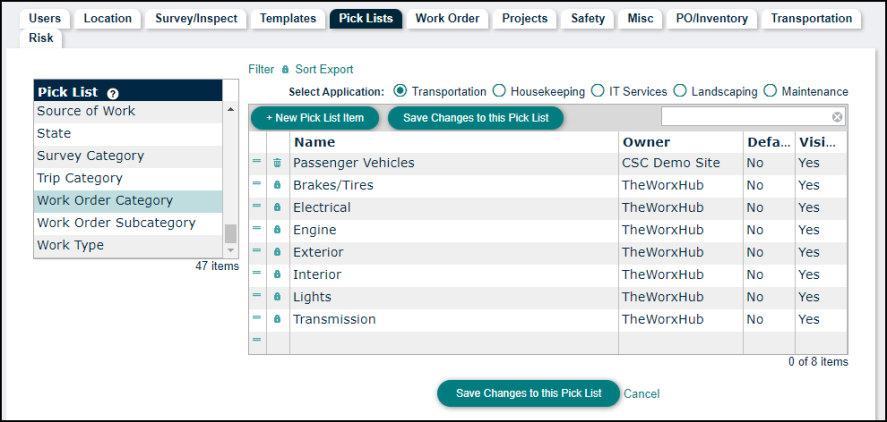
- Click on Settings from the navigation menu, then select the Pick Lists tab.
- Choose the pick list you would like to edit by clicking on the Pick List name. The current pick list items will appear to the right. *Note: Certain pick lists contain different items based on the Department that is selected at the top of the screen. Be sure to select the correct Department before adding a new pick list Item.
- To add an additional item to the pick list, click the New Pick List Item button.
- Enter the Name for the item.
- The Owner will automatically populate with your organization name.
- If you would like for this item to be the Default option for the pick list, click the value in the Default column to reveal a checkbox. Checking this box will make the pick list item the default value.
- To hide pick list items, click the value in the Visible column to reveal a checkbox. Unchecking this box will hide this item to prevent it from being selected. *Note: Items with the lock icon (
 ) next to the pick list Name cannot be deleted, but can be hidden using this method.
 - Rearrange any items by clicking and dragging the reorder (
 ) icon.
 - Click the Save Changes to this Pick List button.